
- Mise en Place,
- Knife Skills
- Searing and Sauteing
- Mother Sauces
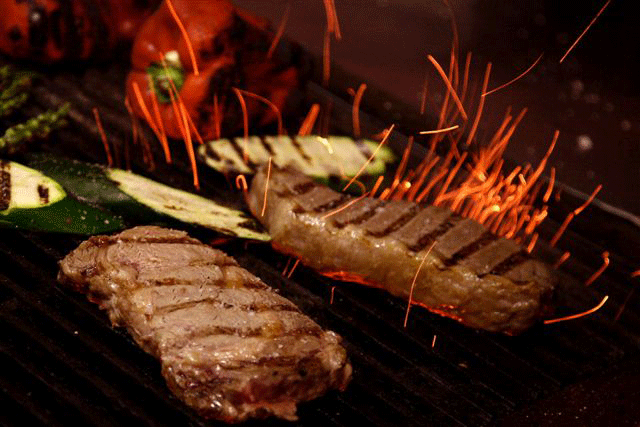
- Grilling Perfect Steaks
- Umami
- Soups and Stocks
- Menu Planning
 Today I'll hopefully answer a question I received from a friend of mine about steaks and specifically, the difference between Dry Aged and Wet Aged . There has been a move in recent years for restaurants to purchase, butcher and dry age all of their own meat. This can be very time consuming and costly method, but with the right love and respect for the process, it yields an amazing end result. People flock to these restaurants to have "In House Dry Aged Bone In Rib-eyes." You can easily do this at home, and wow your friends and quests at the flavor of your incredible steaks.
So what’s all the buzz about? Why are diners drawn to this mysterious preparation? What are the differences between dry aged and wet aged? Why has dry aged beef earned the title of "the ultimate in tenderness and flavor?" Hopefully I can educate you on some of these unanswered questions. It is not as difficult as it may seem and can actually be reproduced in your own refrigerator at home.
 All meat benefits from some amount of aging before being sold and consumed. Dry aging can enhance a steak in many ways, but it can also be very expensive, as it produces a decent amount of waste. The process involves hanging or laying the meat from or on racks in open air, spaced out enough to allow the air to circulate around the exterior. It is done in a constant temperature ranging between 35 and 38 degrees Fahrenheit, and a humidity of 50-60%. Dry-aging beef is basically like making cheese. You are using moisture, temperature, and airflow to allow controlled spoilage of the exterior. This process can be done for 10 to 28 days for optimum results, depending on the size of meat. Once the meat is left in the room or refrigerator for the desired time, you will be able to see spoilage or rotting meat on the outside. Don’t be alarmed, as we are not going to consume that part of the steak. Simply place the aged beef on a clean cutting board and trim off all the excess "rotted" meat. Discard the trim, and be sure to sanitize your knife and board often. What we are left with inside, is a bright red, full of flavor, and very tender steak!
Dry aging a steak will concentrate the meats’ flavor. For example, imagine cooking a soup or a stock on the stove; as the water evaporates, the liquid becomes more fortified and more intense in flavor. The same thing is happening inside the steak. As the moisture evaporates from the exterior of the meat, the interior becomes more concentrated in flavor. Also the fat will produce a nutty and buttery aroma and texture due to dry aging. Fat transfers a lot of flavor and moisture to any steak during the cooking process, and it is even more intense after dry aging the meat. If a steak is over aged though, most of the fat must be trimmed off to reveal the beautifully aged meat, so the benefits of aging in the fat would be lost. Over aging can also yield a very gamey or metallic tasting steak that can be very unpleasant, so be careful when aging at home.
To dry age at home, begin by purchasing the best quality meat available. It is more successful to use a larger cut of beef, like a whole rib-eye or strip loin. Open up the package and dry off the exterior using a dry clean towel. Wrap the meat with several layers of cheesecloth or towels, changing the towels every day replacing the moist towels with dry ones. Place the meat on the bottom shelf of the cooler where it is coldest, and space them out about 2 inches apart. After the desired aging time, you may cut off a steak, and enjoy, leaving the rest of it to age in the cooler. Once trimmed, you may freeze the steaks for several months, as long as they are wrapped tightly in a freezer proof plastic wrap.
 Now that we understand dry aging a bit more, let's explore wet aging. This is a very misunderstood process, as most people believe that this is some type of wet rub or marinade. But the truth is, almost all steaks are wet aged. From the time it takes the meat to be slaughtered, butchered, packaged, sorted, shipped, stored, distributed to the hotel, restaurant or supermarket, the meat is aging. After it is butchered, the meat is wrapped under vacuum in a package called "cryovac", which is an airtight plastic covering. Normally the meat will be shipped and stored for up to 4 weeks before it gets to the consumer. This is wet aged meat, because it is sitting inside that cryovac with all the residual blood and purge releasing into the plastic during that process.
 So then it would be fair to say that all dry aged meat, today, has been wet aged for a period of time. Yes, that would be true, unless of course a restaurant is growing their own cattle out back, and bypassing the meat butcher, packing house and distributor, but this is not very likely.
 Which one is better dry or wet aged? This is definitely a matter of personal opinion, and one that requires a trained palate. We’ll leave that to the steak aficionados! After years of eating these flavorful steaks though, I can attest to their superior quality and unique appeal, but that is only one man’s opinion. Give it a try on your own, or check with you local beef purveyor or butcher shop near you.
 As always, Bon Appetit,


