Translate

Saturday, May 05, 2012

The At Home Cook Series, Installment #8: Menu Planning

Continuing with my The At Home Cook Series, today we'll look at menu planning. So far I have covered: Mise en Place, Knife Skills, Searing and SauteingMother Sauces, Grilling Perfect Steaks, Umami and Soups and Stocks. For the at home cook, menus can be a challenge, especially when planning a week of home cooked meals for you and your family. The easy way most at  home cooks deal with the task, especially if they work outside the home and are pressed for time, is pre-packaged meals that can often be high in sodium, preservatives and may not be the healthiest choice for your family. It is sometimes difficult to keep the family’s palate stimulated week after week, especially if you have to do the 9-5 thing as well. Choosing menu options, budgeting, shopping, preparation, cooking, service and cleanup is a full time job in and of itself! But, with a little help with proper menu planning, cooking for your family, a special holiday meal, or even a dinner party of 8, will be a much more pleasurable experience!

What’s for dinner? First and foremost, understand the task at hand, and create a plan. Menu planning does not have to be complicated. A small investment can reap great rewards. The biggest challenge is remaining organized throughout the week and sticking to your plan. When preparing meals for your family, take only one week at a time. Spend an hour at the end of the week with a piece of paper and a pen (and a glass of wine…believe me it's inspiring!) and jot down ideas for the coming week.

Start with the Sunday newspaper flipping through until you find the right coupon or deal of the day that sparks your interest. Don't forget the numerous websites, twitter and facebook options to find recipes as well. This is the first step to budgeting and an important way for you to be cost effective throughout the week. But, don’t just jump for the deal because it’s cheaper; quality of ingredients should play a very important decision making role. Organics, all natural, gluten free and dealing with food allergies is also an important thing to keep in mind when  planning meals, especially when party planning for large groups, so always check with your guests to insure you don't spend the majority of your evening at the hospital emergency room feeling guilty for almost killing one of your guests.

Begin with proteins, then add vegetables, starch, sauce and any other fun plate additions you can think of. Create an ingredient list, which will become your final shopping list. Check around the house to make sure you don’t purchase something you may already have, then head off to the supermarket. This is where the real fun begins!

Now there are two types of shopper; the spreadsheet type, that has all the information they need, allowing them to be in and out of the supermarket in 30 minutes with the food they need for entire week. They do this, usually, by learning what’s on the shelves at their local food store, planning their menu out ahead of time, then executing their shopping list in a timely fashion. This would describe my mom. She has lists...of her lists. Then there is the shopper who walks into the food store with some idea of what they'll need for the week ahead, usually the staples; bread, milk, eggs etc., but, when it comes to menu planning for the week, they let inspiration guide. This would describe me. I start in the produce aisle, then to the fish and meat departments immediately after that, finding myself visualizing the plates as I then go from aisle to aisle. I can spend hours learning about new products, quality checking, or just creating new ideas right there while I'm shopping. I like to allow the things I find on sale, or the specials, inspire me as to what may be my menu for the week. Remember, you don't always have to stick to what’s on your list. Enter into the shopping experience with a very open mind and be prepared to find substitutions for the food you may have predetermined for dinner. This is how the experience can become fun. Get the family involved with you as well, bring the kids along and make it a challenge to prepare the best meal yet! It will ultimately take the stress off of you (well maybe not the 'taking the kids with you' part of it) and make the ever so irritating question of "What’s for dinner?" disappear.

Now that we have made our purchases, it’s time to get down and dirty. Break out the cutting board, your favorite set of knives, an apron, and start chopping! There are certain ingredients in the kitchen that can be prepared a few days in advance in bulk, to speed up the preparation of each meal. For example, you may slice onions and chop garlic, or even squeeze a few fresh lemons ahead of time and store them in airtight containers in the fridge. Learn how to time your prepping and begin the cooking process at the right time. Get the roast in the oven first, then prepare and cook the vegetables and pasta. This will ensure that you are being efficient in the kitchen, not wasting any time at all. Get the rest of the family involved with washing vegetables, seasoning the steaks, even cutting and chopping. The more they are involved, the more exciting dinner time becomes and they come to understand what goes into preparing the meal.

Ok, so you’ve mastered the art of cooking for your family, but how do you impress your friends? It seems much harder than it is. As a part of this type of menu planning, it is important that you learn more about your guests. Find out what their likes and dislikes are and more importantly, find out if they have any food allergies. At home chefs can have an eye for presentation just as much as the professionals do and with the food TV shows so popular, I’d be apt to say that some of them could hold their own in the industry. Cooking can be very competitive as well, but learning about all the pleasures of cooking is what really makes a successful meal mean more to you and your guests.Don’t worry so much about impressing your friends with "outside of the box" presentations and a list of strange ingredients that none of you can pronounce. Focus on flavor, timing, classy presentations and your guests will appreciate the effort.

As with everything in life, practice makes perfect. Start slowly and get some good practice in before attempting to "one up" your neighbor and invite them over for dinner. Learn about the ingredients you are cooking with, understand how to cook them and the timing will occur naturally. This is the true meaning of menu planning, as it is just as important to plan on paper, as it is in the kitchen.

As always, Bon Appetit!

Lou
Sources : winnond servicemagicproconnection.com  www.dreamstime.com

Thursday, May 03, 2012

NJ's own, Cupcake Wars Judge, Florian Bellanger brings us Mad Mac Macarons...

To millions of foodies and foodnetwork fans around the world, he's become a household name with his hit show, Cupcake Wars. But New Jersey's own Florian Bellanger has long been wowing the culinary & pastry worlds with his incredible skill and sparkling personality for over 20 years. While enjoying the accolades and fame that comes with having a hit TV show, he and his partner Ludovic Augendre have been slowly turning America's palate on what some have described as a funny looking french cookie  with their Paterson, NJ company, Mad Mac Macarons. You can read Chef Bellanger's story here.

The Macaron" or "Gerber," is made primarily of almond flour, sugar, and egg whites. Throughout the years, very little has changed in terms of components. They have a very classic flavor and  colors that are mellow, but recently, the two renowned chefs have experimented, giving the french favorite countless colors and flavors beyond your wildest imagination. Available are such innovative flavors as Peanut Butter, Matcha Green Tea and Pistachio. Best yet, for those with gluten allergies, Mad Mac Macarons are made with no preservatives and are gluten-free.

Recently, Chef Bellanger explained to me, "When we started Mad Mac in 2006, cupcakes were the thing, they were exploding," he explains, "like macarons had done in France years before. But we believe macarons are a product that is part of the future. Even McDonald's in France has macarons on the menu now." This year Mad Mac will sell well over 2 million macarons.

About Macarons
The macaron, not to be confused with the American macaroon, is the most coveted cookie in France, particularly in Paris. It is a favorite sweet of children, the ideal breakfast treat, the beloved cookie of Parisian tea salons, the fashionable gift to give, and the ideal cookie for holidays such as Valentine’s Day and Mother’s Day. The first Macarons were simple cookies, made of almond powder, sugar and egg whites. Many towns throughout France have their own prized tale surrounding this delicacy. In Nancy, the granddaughter of Catherine de Medici was supposedly saved from starvation by eating macarons. In Saint-Jean-de-Luz, the macaron of Chef Adam regaled Louis XIV and Marie-Therese at their wedding celebration in 1660. Only at the beginning of the 20th century did the Macaron become a "double-decker" affair. Pierre Desfontaines, the grandson of Louis Ernest Laduree (Laduree pastry and salon de the, rue Royale in Paris) had the idea to fill them with a "chocolate panache" and to stick them together. Since then, French Macaron cookies have been nationally acclaimed in France and remain the best-selling cookie in pastry retail stores.

You can order Mad Mac Macarons online via their website below, call or send them an email. Mad Mac Macarons are available nationwide. You can see Chef Bellanger on foodnetwork's Cupcake Wars. Check local TV listings near you. 

Bon Appetit

Lou

Spice Market New York: A stellar culinary journey through Southeast Asia

Recently, I had the pleasure of dining at Jean-Georges Vongerichten’s Spice Market New York, located in New York City's legendary Meat Packing District, and this restaurant delivers on all counts. The atmosphere is truly inspirational, transporting you instantly to Southeast Asia.

Vongerichten collaborated with designer Jacques Garcia to create an atmosphere that is warm, cozy, sexy and inviting. With artifacts imported from Rajastan, South India, Burma and Malaysia and combined with custom-made colonial style furniture, the space is literally transformed into, as the restaurant's site describes, "An Oriental cocoon worlds away from the neighborhood’s bustle."  Soft music and lighting add to the wonderful experience, speaking whispers of the special cuisine yet to come.

Inspired by Jean-Georges' trip through Southeast Asia, the menu is a nod to the various foods offered in Vietnamese street markets and Thia food stalls, painstakingly and meticulously delivered by Chef de Cuisine, Anthony Ricco. The food is eclectic, fresh, perfectly portioned and delicious, while being uniquely served family style, allowing all at the table to experience the culinary wonders Chefs Vongerichten and Ricco have created. Service was discreet, with servers being ever present, if unobtrusively so.

All ala carte dishes are moderately priced, and there is also a chef's tasting menu for $48.00 per person. My favorite dishes were the Chicken and Coconut Milk Soup and the Crispy Pork Belly (pictured). All in all, I highly recommend this restaurant and look forward to my next sojourn through the menu.

Spice Market New York - Meatpacking District Restaurant • 403 West 13th Street.New York, NY 10014 • Tel: 212.675.2322 • Get Map

Bon Appetit

Lou

Pesto Stuffed Pork Loin

This recipe was developed by Elaine Giammetta and myself and combines two of my favorite ingredients, Pork & Pesto and includes a special cheese called Brie Stuffed With Cheese; a combination of Brie, Stilton or Bleu and Triple cream. (I agree. we could just enjoy the cheese and leave it at that, but trust me this recipe will make you happy.)

 Pesto Stuffed Pork Loin
Ingredients
3-5 lb pork loin
1/2 cup pesto
Spice rub

The Pesto
Ingredients
3/4 cup arugula leaves 3/4 cup basil leaves
1/4 cup 'Brie stuffed with cheese.' (see NOTE)
1/4 cup pine nuts, whole
4 large cloves garlic, minced (reserve 1 T)
Olive Oil

Method
Place arugula and basil leaves into a food processor. Add the pine nuts and garlic. Slowly add olive oil until paste begins to form. Next take the ‘cheese’ and crumble into the mixture. Pulse until thoroughly mixed. Set aside.

The Spice Rub
Ingredients
1 T minced garlic
1 tsp black pepper, freshly ground
3/4 tsp red pepper flakes, less if you don’t like heat
1/2 tsp fennel seeds
1/2 tsp celery seeds
1/2 tsp thyme, freshly ground
1/4 tsp cumin, freshly ground
Salt to taste

Place all ingredients into a spice grinder (I use whole fresh thyme, cumin pods, & peppercorns) and blend until all spices are powder. Set aside.

Method
Preheat oven to 375 degrees unless you are grilling, then preheat grill to medium-high heat.
Butterfly pork loin until ¾ of an inch thick. Next, using the flat side of a kitchen mallet, pound until ½ inch thick. Using a spatula, spread the pesto mixture over the pork loin. Roll up the loin and use a skewer or chef's twine to keep tightly closed. Take the spice mixture and rub the entire loin, making sure to coat the ends as well. (Reserve the extra rub for the sauce.)

Add 2 T olive oil to a large saute pan and place on medium-high heat. Sear the loin on all sides till golden brown. Once all sides are nicely seared, place the roast on a rack inside a roasting pan with sides. Set aside saute pan without removing fond. Place roast on center rack of the oven and cook for 45 minutes, making sure to periodically check for doneness after 30 minutes. While loin is cooking, add 2 T of balsamic vinegar and the extra rub mixture into the saute pan, making sure to scrape up all the fond. Thin with vegetable or chicken broth and cook on medium-high heat until it reduces to a roux-like consistency. Remove from heat and set aside until pork is done.

Plating
Place the loin on a cutting board and let rest. Using a serrated knife, cut a few ½ inch medallions leaving the rest of the loin whole. Place on plate with medallions fanned out in front. Quickly reheat sauce. Fan out arugula and or basil leaves putting a small spoonful of sauce at their base. Serve.

NOTE: The cheese used in this recipe is called 'Brie stuffed with cheese.' If you cannot find this at the local store where you buy your cheese, it's easy to make your own. Simply combine Brie, any blued veined cheese and a triple cream. WOW, you will not be disappointed. You can probably find a blue veined Brie more easily, so just add the triple cream.

 As always, Bon Appetit!

Lou

The At Home Cook Series, Installment #7: Soups, Stocks and Family Traditions.

Family tradition is one of the most beautiful aspects of cooking. Sharing recipes and methods of preparation down through generations, has become one of the most creative ways for home cooks to create a niche for themselves in the kitchen. Talk to most chefs, both acclaimed and not, and they will readily admit somewhere in their r'epertoire is most likely a recipe or number of recipes, derived or adapted from childhood memory or recipes handed down through the family over the years. Some chefs have even made TV careers & businesses from these love filled, time tested recipes. My mom has an amazing array of recipes, quite a few hand written by my grandmother and they are as prized as any jewel or heirloom within the family. Especially the soups and stocks. So today I'll explore this topic in what is my seventh installment in what I call "The At Home Cook Series." In installments one through seven, we explored Mise en Place, Knife Skills, Searing and SauteingMother Sauces, Grilling Perfect Steaks and Umami, or what some refer to as 'The Fifth Flavor.' Be sure to check out the whole series for tips and techniques designed to enhance your at home cooking experience in the kitchen.

Stock
To begin, let's take the simple definition. Most soups start with some type of broth or stock which is defined as; a liquid (usually water) that is fortified with a definite flavor. Different types of stocks include, vegetable, chicken, beef, duck, fish, lobster, corn, asparagus, etc The list is endless depending on what flavor you are looking for and, of course the ingredients that you are going to use it in. The final flavor you are trying to achieve determines how you are going to treat the ingredients going in. As an example were you to be making corn stock, your flavors would take on a completely different profile if you were using raw corn vs. roasted corn. Developing a base flavor is an important part, if not the most important part, of a successful soup and that can be achieved in many ways. If the home cook wants to make a meaty and rich soup for instance, it is important to caramelize the meat and vegetables first, then deglaze the pan with a liquid (sometimes red or white wine) to remove the flavorful pieces from the bottom of the pan (called fond) and add those flavors to the soup resulting in a richness of flavor that we discussed in my last installment, Umami.

A French term called ‘Mirepoix,’ is the foundation of most soups and stocks. This is a mixture of 2 parts onion, 1 part carrot, and 1 part celery. Aromatics are flavor enhancers that are added to your stock to bloom or boost flavors. Aromatics include: peppercorns, bay leaves, juniper berries, any herbs, any onions, or garlic.


Most importantly, we need to determine what type of stock we want to create, and then decide what the future of our beautiful stock will be. After you have added all your ingredients, you are now ready to let your stock simmer. A simmer is a temperature between 190-200 degrees and different stocks have different simmering times in order to reach their fullness of flavor:

Vegetable stocks~45 minutes
Fish stocks~1 hour 30 minutes
Chicken (Poultry) stocks~2 hours
Beef stocks~6 hours ( pre-roast the bones)

Once your stock is completely simmered to it's full richness, the final step is straining your it properly. What we are looking for is a pure, smooth and beautiful liquid so at this point we need to pass it through a strainer or "cheesecloth" to remove all impurities and vegetables, or large ingredients. Your stock can now be used immediately, or can be frozen in smaller batches to be thawed and used the next time you decide to make a soup or sauce.

Soup
Soup is a food that is made by combining ingredients such as meat and vegetables in stock or hot/boiling water, until the flavor is extracted, forming a broth. Traditionally, soups are classified into two broad groups: clear soups and thick soups. The established French classifications of clear soups are bouillon and consommé. Thick soups are classified depending upon the type of thickening agent used:
purées are vegetable soups thickened with starch;
bisques are made from puréed shellfish thickened with cream;
cream soups are thickened with béchamel sauce;
veloutes are thickened with eggs, butter and cream.

Other ingredients commonly used to thicken soups and broths include rice, flour, and grains and beans. The word soup originates from "sop," a dish originally consisting of a soup or thick stew which was soaked up with pieces of bread. The modern meaning of sop has been limited to just the bread intended to be dipped.

Cooking with the seasons can be a lot of fun, s when thinking soups and stocks, consider ingredients available at that time of year and enjoy gathering ingredients that are at their peek of freshness. Autumn is by far my favorite season for soups and I enjoy making heartier soups. Below is a simple recipe for butternut squash soup. It should only take approximately 35 minutes to prepare and the flavors are wonderful!

Butternut Squash Soup
Ingredients
1 butternut squash, peeled
1 onion, chopped
2 tsp nutmeg
2 tablespoons unsalted butter
6 cups chicken stock
Salt and pepper (to taste)

Method
Cut squash into 1-inch chunks. In a large pot melt butter. Add onion and cook until translucent, about 8 minutes. Add squash and stock. Bring to a simmer and cook until squash is tender. Remove squash chunks with slotted spoon and place in a blender and puree. You may have to add a bit of the cooking liquid to achieve the desired consistency. Return blended squash to the pot. Stir and season with nutmeg, salt, and pepper.

To Plate
Garnishes for the soup may vary, you can make a cinnamon flavored crème fraiche, pumpkin croutons, or just garnish with chopped chives.

Try your hand at your family's traditional soups or get creative with ingredients and start your own traditions. Remember practice makes perfect. Either way, it's a great way to warm the stomachs and the hearts of your family and friends. Enjoy!

As always, Bon Appetit!

Lou

Sunday, April 29, 2012

Tequila ~ Key Lime Tarts with Tequila Caviar

Tequila~Key Lime Tarts with Tequila Caviar
This recipe is for the more advanced chef and combines two of my favorite things; Tequila as an ingredient and a bit of  Molecular Gastronomy as a method that you can do at home. You can simply make the Tarts and leave it at that, but for you more adventurous chefs, I've included the recipe for the Tequila Caviar as well. Good Luck!

Ingredients
Graham Crust
1 lb. graham cracker crumbs
8 oz sugar
4 oz pastry flour
8 oz melted butter
Sugar dough
2 lb butter
12 oz sugar
1/4 oz salt
9 oz eggs
3 lb pastry flour

Method
Graham crust: Mix well and set aside.
Sugar dough: Mix the butter, sugar and salt at low speed, add eggs, flour and mix just until evenly blended. Chill for a few hours before using.

Filling
Ingredients
14 oz sweetened condensed milk
3 egg yolks
3 oz key lime juice
1 oz tequila
Mix well and refrigerate

To Assemble
First, decide if you are going to use a sugar dough base or a graham base. If you choose sugar dough you will need to roll out the dough after it has chilled and form it in to your tart pan or pie pan. If you opt for graham, form the graham into the mold by simply pressing it in. Both shells need to be par baked for 12-15 minutes. While the tarts are baking prepare the filling. Fill the molds with key lime filling and bake for about 15 minutes or until filling is set. Let cool and remove from pan. Decorate and serve.

For you adventurous chefs, here is how to make the Tequila Caviar.

Tequila Caviar

Ingredients
3 oz simple syrup
3 oz key lime juice
3 oz tequila
.8% agar agar
.2 % locust bean gum
Frozen vegetable oil


Method
One day prior to assembly put oil in the freezer. The day you are making the caviar, remove the oil from freezer 1 hour before using. Allow the oil to defrost, but keep it cold. Mix juice, tequila, agar agar and locust bean gum using a hand held mixer for about 1 minute. Let mix sit for a few hours to allow some of the bubbles to disappear. Bring caviar mix to a boil and strain.

When the caviar mix is ready, it needs to be warm and the oil needs to be cold. Pour the hot mix into a piping bag. Cut a very tiny hole in the bag, so small that you have to squeeze a bit to get the drips out. Above the oil, start squeezing out the mix in small drops using a circular motion. You can adjust the size of the caviar by adjusting your height above the oil. Further away makes smaller balls, closer makes larger balls. The caviar will sink to the bottom of the bowl as the mix gets warmer. Once the mix is done,  strain the oil and the caviar will remain in the sieve. Delicately rinse the caviar in cold water and use as decoration.

I hope you try the recipe for the Caviar for yourselves and don't worry if your first attempt doesn't come out quite right. It took me three tries to get the Caviar method down, so don't be discouraged. As with everything, practice make perfect and remember; the plating here was done specifically for presentation and publishing purposes. Just get creative with your plating and enjoy the wonderful flavors that will wow your friends and family.

Bon Appetit

Lou

Friday, April 27, 2012

The At Home Cook Series Installment #6: Cooking with Umami... The Fifth Flavor

Welcome to the sixth installment of my At Home Cook Series. In  the first five installments, we delved into the basics of being in the kitchen with proper techniques. So far we have covered, Mise en Place, Knife Skills, Searing and Sauteing and Mother Sauces and Grilling Perfect Steaks.

Today is all about taste and what's known as "The Fifth Flavor," Umami. Huh, you say? You've heard of Sweet, Salty, Sour, Bitter, but….Umami? While many of you may not be familiar with the phrase, but accomplished chefs around the world, more and more, make Umami the focus of their cuisine. Many specialists now understand that taste is actually more complicated, with the taste buds being helped along by sense of smell, by the feel of substances in the mouth and even by the noise that food makes when we chew it. This newly found taste for a while was almost unexplainable and a bit of a mystery. But in the early 1900s, Dr. Kikunae Ikeda of the Tokyo
Dr. Kikunae Ikeda
Imperial University, identified this taste when studying the flavors in seaweed broth. Ikeda isolated monosodium glutamate as the chemical responsible and with the help of the Ajinomoto company, began commercial distribution of MSG products.

Photo: Mimi Oka and Doug Fitch
So what is it, and how do I cook with it? It is actually not a physical ingredient, but more of a natural occurring amino acid that gives off a pleasant savory taste. They are found in many meats, vegetables, seafood and dairy. The word Umami is a Japanese word which means tasty, delicious, or yummy. It has also been associated with other words including meaty, brothy and savory. Not everyone can differentiate the taste from the common four, but its popularity has become more widespread in recent years. For example, there is now a Umami Food and Art Festival in NY that is dedicated to educating culinary professionals and artists about this mysterious taste. Kikkoman’s Soy Sauce has begun an advertising campaign with top chefs from around the world using Umami as part of their slogan, to raise awareness of the uses of their soy sauce products to enhance the Umami experience.

For the professional chef, it is very important to create the full dining experience through the arousal of the senses. One of the largest contributors to that is taste and the foundation of taste relies on the combination of flavors and ultimate balance. There are a few rules to balancing tastes, most of which are emotional, and all of which involve complete awareness of the ingredients at hand. Ingredients are never constant, they are always changing. Today a tomato may have more water in it than it will tomorrow and the fresh basil just picked out of the garden may become a bit dull overnight. To fully balance a dish, we need to understand the tastes, temperatures and textures that go into it. Balancing hot and cold, or sweet and spicy, or acidic and salty all involve a great deal of knowledge and awareness. But all of this can be learned by the at home cook through practice and opening up your true senses.

Taste and flavor are commonly associated as one in the same, but there is a definite distinction between the two. It is said that taste is the sensation caused in the mouth by contact with a substance, while flavor is the mixed sensation of both smell and taste. To simplify this research, it would be safe to say that the formula of taste + smell = flavor. Umami as an ingredient, becomes a flavor enhancer, bringing depth to your food without covering any flavors or subtle tastes. It is found in more mature foods such as an older Parmesan cheese, aged wine, or soy sauce.

Umami rich foods are very satisfying and can actually be a healthier way to cook as well. They tend to make salt taste saltier, which means we can lower the amount of sodium in a dish when using Umami rich ingredients. It also creates a sensation that most chefs call "mouth feel," which is normally associated with the mouth sensation we get when we eat foods high in fat. Thus, we may lower the amount of fat in a dish, and let the richness of the Umami do the trick.

Here is a starter list of a few ingredients that are very Umami rich, and would lend a great deal of taste and flavor to any home cooked meal.


 Seafood: fish sauce, anchovies, kombu, nori, dried bonito flakes, makeral, seabream, tuna, cod, prawns, squid, oysters, shellfish.


Meat: beef, pork and chicken.


 Vegetables: dried and fresh shiitake mushrooms, corn, truffles, soy beans, potatoes, sweet potatoes, Chinese cabbage, carrots and tomatoes.


Other Foods: Parmesan cheese and Green Tea.

In conclusion, the ability to experience this so called,  fifth taste, is totally dependent on one’s self awareness. Umami is a very powerful taste and one that I'm sure will be researched and analyzed for years to come and I encourage you to do your own experiments and research. My friends, even though we were all taught otherwise, since the time when we were children, it is time to put aside your mom's admonitions. The only way to become a better cook and be more aware is to play with your food, so get to the store, buy some Umami rich ingredients and start playing and cooking for yourselves!

Bon Appetit!

Lou
Sources: www.barmixmaster.com , www.glutamate.org , www.stratfordbar.com , www.burtfamilybutchers.co.uk

Thursday, April 26, 2012

Ice Wines; A Comprehensive Look...

I adore dessert wines. I don't know where this love came from but as of late, I can't get my fill. Having gone through ports, muscats, and then lingering for a bit on a personal favorite of mine, Vin Santo Chianti Classico Reserva, I have now discovered ice wines. Though some of you wine connoisseurs may be familiar with these wonderful dessert aperitifs, more and more occasional wine enthusiasts are now discovering these exceptional wines.

Ice wine, or Eiswein, originated in Franconia, Germany in 1794. Grapes were left on the vines until the first deep frost, and the freeze/thaw cycles that occurred concentrated both the sugars and flavors of the grapes. The process was refined and now ice wines are highly prized produced in Germany, Austria and Canada. The Niagara region of Ontario, Canada is currently the most widely respected producer of ice wines in the world.

Franconia, Germany
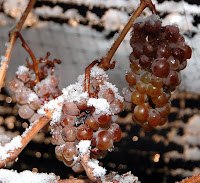
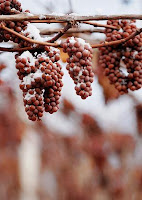
Ice wine is a type of dessert wine produced from grapes that have been frozen while still on the vine. The sugars and other dissolved solids do not freeze, but the water does, allowing a more concentrated grape must to be pressed from the frozen grapes which results in a smaller amount of more concentrated, very sweet wine. With ice wines, the freezing happens before the fermentation, not afterwards. Unlike the grapes from which other dessert wines, such as Sauternes, Tokaji, or Trockenbeerenauslese, are made, ice wine grapes should not be affected by Botrytis cinerea or noble rot, at least not to any great degree. Only healthy grapes keep in good shape until the opportunity arises for an ice wine harvest, which in extreme cases can occur after the New Year, on a northern hemisphere calendar. This gives ice wine its characteristic refreshing sweetness balanced by high acidity. When the grapes are free of Botrytis, they are said to come in "clean." Due to the labor-intense and risky production process resulting in relatively small amounts of wine, ice wines are generally quite expensive. This chart shows how sugar varies with the temperature:

Temperature ~ Sugar Content
  • -6°C     29%
  • -7°C     33%
  • -8°C     36%
  • -9°C     39%
  • -10°C    43%
  • -11°C    46%
  • -12°C    49%
  • -13°C    52%
  • -14°C    56%
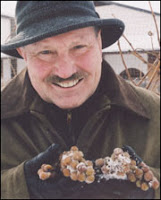
As in all harvests, the exact moment of harvest is extremely important for ice wine. Ideally, the temperature should get to -10°C to -13°C before picking. By waiting till this perfect moment, the grape achieves the optimum level of sugar and flavor. They are then carefully picked by hand. Grapes in this condition have a very low yield; often an entire vine only makes a single bottle and this is typically why ice wine can be so expensive, often sold in half-bottles only.

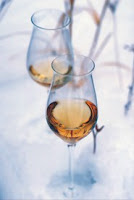
Ice wine is typically made of Vidal and Riesling grapes. After this long harvest process, the grapes go through weeks of fermentation, followed by a few months of barrel aging. The wine ends up a golden color, or a deep, rich amber and has a very sweet taste. The flavor is a combination of apricot, peach, mango, melon or other sweet fruits with a nutty aroma. It is usually enjoyed as a dessert wine, chilled for one or two hours and served in small cordial glasses.

Ice Wine History
There are indications that frozen grapes were used to make wine as early as Roman times. Pliny the Elder (AD 23 - 79) wrote about certain grape varieties that they were not harvested before frost had occurred. The poet Martial (AD 40 - 102) recommended that grapes should be left on the vine until November or until they were stiff with frost.

Pliny the Elder
Pliny the Elder
Details as to the wine-making and description of these wines are unknown. It can not be completely ruled out that the descriptions refer to dried grape wines, a common style of wine in Roman times, where the raisin-like grapes were harvested late enough for the first frost to have fallen. In either case, the method seems later to have been forgotten.

It is believed that the first post-Roman ice wine was made in Franconia in Germany in 1794. Better documentation exists for an ice wine harvest in Dromersheim close to Bingen in Rheinhessen on February 11, 1830. The grapes were of the 1829 vintage. That winter was harsh and some wine-growers had the idea to leave grapes hanging on the vine for use as animal fodder. When it was noticed that these grapes yielded very sweet must, they were pressed and an ice wine was produced. It should be noted that sweet wines produced from late harvested grapes were well-established as the most valued German wine style by the early 19th century, following the discovery of Spätlese at Schloss Johannisberg in Rheingau in 1775, and the subsequent introduction of the Auslese designation. These wines would usually be produced from grapes affected by noble rot. Thus, Eiswein is a more recent German wine style than the botrytised wines.

Schloss Johannisberg
Throughout the 19th century and until 1960, Eiswein harvests were a rare occurrence in Germany. Only six 19th century vintages with Eiswein harvests have been documented, including 1858, the first Eiswein at Schloss Johannisberg. There seems to have been little effort to systematically produce these wines during this period, and their production was probably the rare result of freak weather conditions. It was the invention of the pneumatic bladder press which made the production of ice wine practical and led to a substantial increase in the frequency and Schloss Johannisberg quantities of production. 1961 saw the production of a number of German ice wines and the wine increased in popularity in the following years. The production has also been assisted by other technological inventions in the form of electrical lighting driven by portable generators (to assist harvest in the cold hours of morning darkness, before the grapes thaw) and plastic films that are used for "packaging" the vines in order to protect the ripe grapes from being eaten by birds while the wine-grower waits for frost.

Karl Kaiser
The pioneer status of the winery Inniskillin in Niagara-on-the-Lake, Ontario led to their first ice wine, produced in 1984 under the direction of the winery's Austrian-born co-owner Karl Kaiser, often being mentioned as Canada's first ice wine. However, ice wine was produced in the Okanagan Valley of British Columbia by German immigrant Walter Hainle in 1972. This ice wine was the result of an early and unexpected frost and yielded 40 litres of wine, which Hainle originally did not intend to sell, although he did so in 1978. In 1983, Karl Kaiser and Inniskillin's German neighbor Ewald Reif, as well as two wineries with Austrian winemakers located in another part of Ontario, Hillebrand and Pelee Island, all left grapes on their vines in order to try to produce ice wine. Inniskillin and Reif lost their entire crop to hungry birds, while Hillebrand and Pelee Island were able to harvest a minuscule amount of frozen grapes. In 1984, Kaiser used nets to protect his vines and was able to produce Inniskillin's first ice wine. This wine was made from Vidal grapes and was in fact labelled "Eiswein".

After the ice wine production was set on commercial footing, Canadian ice wine quickly became popular with domestic consumers and reviewers and many other Canadian producers picked up the idea, since the harsh Canadian winters lend themselves well to the large-scale production. The international breakthrough of Canadian ice wine came in 1991, when Inniskillin's 1989 Vidal ice wine won the Grand Prix d’Honneur at Vinexpo. The Canadian trend towards increased cultivation of Vitis vinifera (European) grape varieties in the 1990s expanded the palette of varieties available to be bitten by frost. By the early 2000s, Canada was established as the largest producer of ice wine in the world.

In Germany in the early 2000s, good ice wine vintages have been more rare than throughout the 1980s and 1990s. Many wine-growers cite climate change as a cause and this received support from a study by the Geisenheim Institute.

Riesling
Ice Wine Grapes
Typical grapes used for ice wine production are Riesling, considered to be the most noble variety by German winemakers; Vidal, highly popular in British Columbia and Ontario, Canada; and, interestingly, the red grape Cabernet Franc. Many vintners, especially from the New World, are experimenting with making ice wine from other varieties: whites such as Seyval Blanc, Chardonnay, Kerner, Gewürztraminer, Chenin Blanc, Pinot Blanc, and Ehrenfelser; or reds such as Merlot, Pinot Noir, and even Cabernet Sauvignon. Pillitteri Estates Winery from the Niagara-on-the-Lake region of Ontario claim to be the first winery in the world producing Shiraz (Syrah) ice wine with the 2004 vintage. Ice wines from white varieties tend to be pale
Vidal
yellow or light gold in color when they are young and can maderise (acquiring a deep amber-golden color) as they age. The red varieties tend to have a light burgundy or even pink color like that of rosé wines.Some vintners in Canada have taken a step forward in experimenting with sparkling ice wine. Sparkling ice wines have texture similar to other sparkling wines, such as champagne or Asti, but with fuller body, and a significantly higher sugar level balanced with high acidity.


Ice Wine Production
Natural ice wines require a hard freeze (by law in Canada 17 °F or colder, and in Germany 19 °F or colder), to occur sometime after the grapes are ripe, which means that the grapes may hang on the vine for several months following the normal 
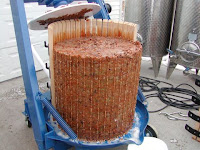
harvest. If a freeze does not come quickly enough, the grapes may rot and the crop will be lost. If the freeze is too severe, no juice can be extracted. Vineland Winery in Ontario once broke their pneumatic press in the 1990s while pressing the frozen grapes because they were too hard. The longer the harvest is delayed, the more fruit will be lost to wild animals and dropped fruit. Since the fruit must be pressed while it is still frozen, pickers often must work at night or very early in the morning, harvesting thegrapes within a few hours, while cellar workers must work in unheated spaces.

In Austria, Germany, and Canada, the grapes must freeze naturally to be called ice wine. In other countries, some winemakers use cryoextraction (that is, mechanical freezing) to simulate the effect of a frost and typically do not leave the grapes to hang for extended periods as is done with natural ice wines. These non-traditional ice wines are sometimes referred to as "icebox wines". An example is Bonny Doon's Vin de Glacière. The high sugar level in the must leads to a slower-than-normal fermentation. It may take months to complete the fermentation (compared to days or weeks for regular wines) and special strains of yeasts should be used.

My Selections
Egon Muller, Riesling, Eiswein, Mosel-Saar-Ruwer, Scharzhofberger, 1996:  Deep golden colored, this full bodied Eiswine has a nearly ideal combination between hyper-sweetness and refreshing acidity, along with lemon-lime, citrus peel and minerals. A long spicy finish that cannot help but enchant. One meant for early drinking or medium term cellaring, the wine should cellar comfortably until 2020.  

Krebs-Grode, Eiswein, Auxerrois, Eiswein Rheinhessen, 1998:  Medium bodied, with abundant spices on a deliciously sweet background of pineapples, lime and apricots and with generous hints of sweet cream and minerals, this superbly balanced and remarkably elegant wine has flavors that linger seemingly without end. Best drinking now - 2012.


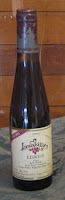
Inniskillin, Ice Wine, 2001:  Traditional ice wine, easily comparable to the best of Germany, this deeply sweet, but remarkably well balanced and elegant wine almost attacks you with luxurious flavors of peaches, lychees, pears in the way of fruits and then honey, cinnamon and candied fruits on the long finish. Full bodied, with just the right amount of natural acidity, the wine is drinking nicely even now.

Inniskillin, Ice Wine, Vidal, 1999:  This full bodied, bronzed orange wine is showing smooth and rich with honey and apple sweetness, together with aromas and flavors of dried apricots, yellow peaches and mangoes, Which overlay comfortably by light cinnamon-ginger flavors. Long and mouth-filling, the wine is drinking beautifully now and promises to cellar well until 2010 - 2012.

Columbia Crest, Semillon Ice Wine, Reserve, 1998: Full bodied, with intense honeyed sweetness and with delicious fig and summer fruits matched nicely by mocha and spiced roasted nut flavors and aromas. Excellent balance between fruits, sweetness and acidity and a very long finish add enormously to the charm of the wine. Drink 2002 - 2012 or longer.

Tasting
Even though it is normal for residual sugar content in ice wine to run from 180 g/L up to as high as 320 g/L, ice wine is very refreshing (as opposed to cloying) due to high acidity. Ice wine usually has a medium to full body, with a long lingering finish. The nose is usually reminiscent of peach, pear, dried apricot, honey, citrus, figs, caramel, green apple, etc., depending on the varietal. The aroma of tropical and exotic fruits such as pineapple, mango, or lychee is quite common, especially on white varietals.

Ice wine usually has a slightly lower alcohol content than regular table wine with some  Riesling ice wines from Germany having an alcohol content as low as 6%. Ice wines produced in Canada usually have higher alcohol content, between eight and 13 percent. In most years, ice wines from Canada generally have higher brix degree (must weight) compared to those from Germany. This is largely due to the more consistent winters in Canada. Must with insufficient brix level cannot be made into ice wine, and is thus often sold as "special select late harvest" or "select late harvest" at a fraction of the price that true ice wine commands.

Connoisseurs argue about whether ice wine improves with age or is meant to be drunk young. Those who support aging claim that ice wine's very high sugar level (which is often much higher than that of Sauternes) and high acidity preserve the content for many years after bottling. Those who disagree contend that as ice wine ages, it loses its distinctive acidity, fruitiness, aroma, and freshness.

Since I'm just a simple lover of ice wines, I'll concentrate on the drinking and leave the arguing to the so called 'experts.' What I am hopeful of is that once you try a quality ice wine, especially if it's after reading this article,  you raise a toast to me.

Bon Appetit!

Lou


edenwine.co.uk, longviewwinery.com, trentobike.org, spicetrader.net, Wolfgang Shultz, inniskillin, gvstudios.com, wineandpassionaccessories.com, lancette-arts.journal.ca, cookinglight.com, wikipedia.org

Saturday, April 21, 2012

Rachael Ray's Late Night Bacon Recipe & Life's Other Gastronomic Conundrum Solved For You!

(Parody) If you are a regular reader of mine for any length of time, you know of my love for the awesome recipes coming out of foodnetwork's test kitchens. I am not usually one to write about them, but when this complex recipe from Rachael Ray was brought to my attention, I realized that there was a real need to bring to you my, readers, explanations of this as well as some of the other recipes you may be wanting to make, but are too intimidated to try.

First, with all due credit to the foodnetwork and Rachael Ray, I will reprint her awesome recipe here for your enjoyment along with my comments and a link to it on foodnetwork.com, in case you get a bit confused.

Rachael Ray's "Late Night Bacon" Recipe
see it here on foodnetwork's site to verify!

Ingredients
8 slices of bacon. (Now here's where it gets complicated; Can we substitute turkey bacon? Should it be center cut, thick cut, maple flavored? Is there any particular brand? So many questions left unanswered....)

Method
Place 2 sheets of paper towel on a microwave safe plate. Lay the bacon out on the paper towel not overlapping the slices. Place 2 more sheets of paper towel on top. Place in the microwave on high for 4 to 6 minutes. Serve.
(Whoa... wait a minute, u can't just leave me hanging like this; I looked but couldn't find the place on my plate that told me if it was microwave safe. Should I call the manufacturer, or can I get that info from foodnetwork support? What kind of paper towels? Does the design on the paper towel matter? Can I substitute toilet paper for paper towels? What happens if I accidentally overlap the bacon and should I use a face mask to protect myself just in case? Lastly, can I only make this at night, or do I have to modify the recipe if I want to make this say.. in the morning...for breakfast?)
If you have any trouble with this, my email is always open to you. please be careful.

So now that we have covered bacon, the following is a recipe that I have toiled over in the GGM test kitchens, in order to make sure you can enjoy this gourmet delight at home. Feel free to improvise and substitute, but only if you've had some training and are if you are feeling very, very adventurous.

Lou's Bleached Flour Bread Slices w/Peanut Mash & Grape Gelee
(can be eaten anytime)

For the bread
Ingredients
2 slices White bread*
(*for the more advanced cook, you can substitute the white bread with bread that has little little bit's of grain and seeds, sometimes called whole grain)

For the Peanut Mash
Peanuts
Oil
Salt
(Store bought 'peanut butter' is a perfectly acceptable substitute and there is no need to feel guilty for making the recipe more convenient and easy. No one would blame you. Cooking from scratch is hard.)

For the Grape Gelee
Grapes
Sugar
(Again, store pre-prepared jelly is perfectly acceptable to use. It even comes in different flavors, such as orange, strawberry, etc., but don't get too adventurous here. Stick with jelly as most of your guests may not be ready for marmalade*)
*I'll cover marmalade in another post. It's too complicated to explain here.

Method
Now here's where things get tricky, so pay attention. Carefully place one slice of the bread in the center of a plate. Leave one aside to finish presentation. Spoon 2 tablespoons of the peanut mash mixture onto the bread. I like to microwave my peanut mash prior to serving and actually pour it onto the bread instead of trying to spread it out in order to prevent the bread from balling or tearing and ruining the presentation. I am no Sandra Lee and am afraid to try spreading it without training. Carefully insert a teaspoon into the grape gelee or jelly and put some on the spoon. Now ever so gently, place atop the peanut mash and carefully spread til it covers all the mash. Next, carefully place the remaining white bread slice we set aside atop the gelee, being careful to line up all sides evenly. Serve with a glass of milk.

Should you have any questions feel free to email me and I'll walk you though it. Next week we'll cover a very intimidating topic; "How to make perfect Toaster Waffles.' But bring your A game and possibly have a friend assist you, to help avoid burns or serious injury. Enjoy.

As always, Bon Appetit!

Lou